
Getting beautiful, elegant and sparkly nails at home is simpler than it sounds. Whether you’re preparing for a special occasion or just treating yourself to some self-care, creating a sparkling manicure at home can be fun and rewarding. This comprehensive guide will walk you through everything you need to know, from gathering your tools to adding the perfect shine. You’ll find easy tips, pro secrets, and even some creative ways to add personal flair to your nails.
Step 1: Gather Your Nail Essentials 🛍️
Before you start, it’s important to have the right tools on hand. The key to achieving sparkly nails at home is in the preparation. Here’s a list of the essential items you’ll need:
- Basic Nail Care Tools: Nail file, buffer, cuticle pusher, and nail clipper.
- Nail Polish & Sparkle Elements:
- Base Coat & Top Coat: These are essential for creating a long-lasting manicure.
- Elegant Nail Colors: Opt for shades like nude, pink, white, and pastel colors to set the base for your sparkly nails.
- Glitter Polishes & Sparkly Powders: Gold, silver, and holographic glitter will add that perfect shine.
- Nail Charms & Accessories: Tiny rhinestones, pearls, or even metallic stickers can add extra flair to your look.
Pro Tip: Using a gel polish or long-lasting top coat ensures that your sparkly nails stay intact for longer periods.
Step 2: Prepping Your Nails for a Flawless Finish ✨
A good manicure begins with a proper prep. Without this, even the best nail polish won’t look as good or last as long. Follow these steps for a polished look:
- Shape Your Nails:
Whether you prefer oval, almond, or coffin-shaped nails, find the shape that suits your hands best. This simple step can make a huge difference in how your nails look. - Buff and Smooth:
Gently buff the surface of your nails to smooth out any ridges and remove any old polish. A smooth surface helps the new polish adhere better. - Cuticle Care:
Use a cuticle pusher to push back your cuticles gently. Apply cuticle oil to hydrate and soften them, giving your nails a clean, polished look.
Pro Tip: If you want your hands to look even more elegant, treat them to a hydrating hand mask or lotion before starting your manicure.

Step 3: Applying the Perfect Elegant Base 🎨
The base of your sparkly nails sets the stage for the final result. Follow these steps to ensure your nails have a smooth, even canvas for the glitter:
- Apply a Base Coat:
Start with a base coat to prevent staining and protect your nails. It also helps the polish go on more evenly. - Choose Your Elegant Shade:
- Nude, blush pink, or light beige for a soft and classy look.
- White, pastel blue, or lavender for a more trendy and fresh feel.
- Metallic rose gold or champagne for a luxurious, shiny finish.
- Apply Two Thin Coats of Polish:
Thin coats are key to achieving a smooth, even color without streaks. Let each coat dry fully before applying the next one.
Pro Tip: Allow about 60 seconds of drying time between coats to prevent smudging or streaking.
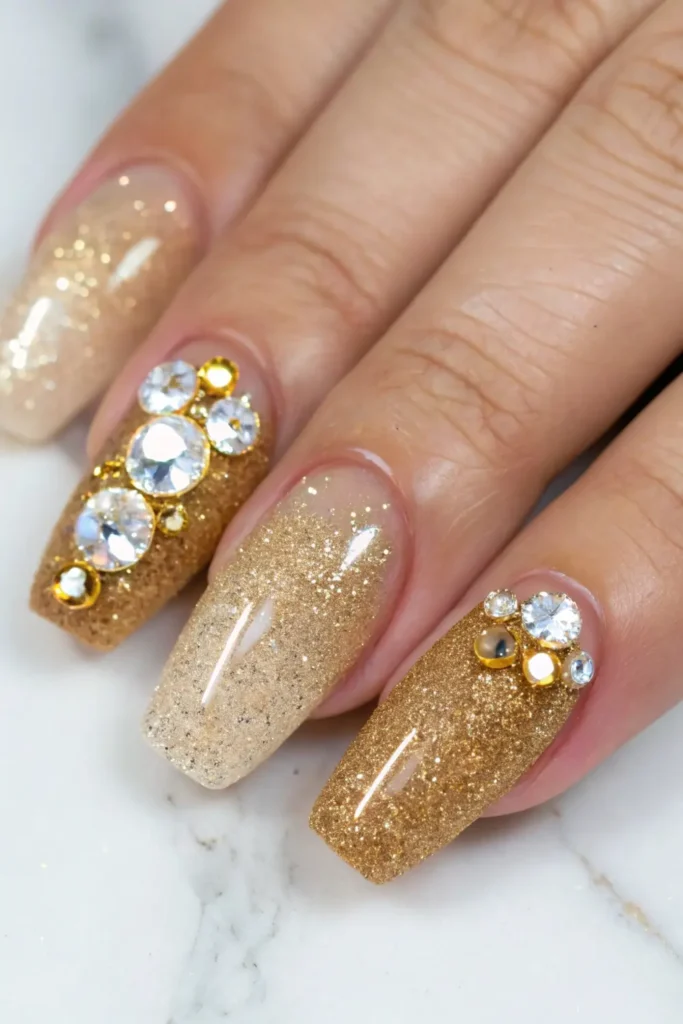
Step 4: Adding the Sparkle! ✨
This is the fun part! Adding the sparkle is what turns a regular manicure into an eye-catching, glamorous design. Here’s how to do it:
- For a Subtle Elegant Shine:
- Apply a shimmer top coat over your base color to add a gentle glimmer.
- Use fine glitter polish only on the tips for a classic French-glitter look. This provides a refined sparkle that’s perfect for everyday wear.
- For a Bold Sparkly Effect:
- Dab loose glitter onto your wet polish for a more intense sparkle.
- Add rhinestones or nail charms on accent nails for a high-impact, glamorous finish.
Pro Tip: Want to create a gradient glitter effect? Use the sponge technique to dab glitter on the tips and blend it down to create a smooth transition.
Step 5: Sealing the Look for Long-Lasting Glam 💎
The final step is all about preserving your hard work and ensuring your nails stay beautiful for as long as possible. Here’s how to do it:
- Apply a Quick-Dry Top Coat:
This will help seal in the glitter, prevent chipping, and give your nails an extra glossy finish. - Use Cuticle Oil Again:
Reapply cuticle oil to keep your cuticles healthy and nourished. It also adds a nice finishing touch to your hands. Buy on Amazon - Let It Dry Properly:
Allow at least 15-20 minutes for your nails to dry completely. Don’t rush this step; giving your nails time to dry ensures they stay intact for longer.
Pro Tip: For a unique look, try a matte top coat over your sparkly nails for a soft, elegant finish.
Bonus: Matching Accessories for a Complete Look 💍
No look is complete without a little extra shine. Here’s how to elevate your sparkly nails with the right accessories:
- Nail Rings: Add small, delicate rings to your fingers for a subtle touch of glamour.
- Hand Jewelry: Coordinate with minimalist bracelets or statement rings for a polished, complete look.
- Outfit Coordination: Sparkly nails look best with neutral or pastel-colored outfits for a balanced and sophisticated style.
Conclusion 🌟
Achieving the perfect elegant & sparkly nails at home is easier than you think. With the right tools, a little patience, and some creativity, you can enjoy salon-style nails right from your own home. Whether you’re prepping for a special occasion or simply treating yourself, these simple steps will help you achieve a polished, glamorous look every time.
Engagement: Have you tried creating sparkly nails at home? Share your experiences in the comments below, and let us know what worked best for you!
Call to Action: Want more trendy nail ideas? Be sure to follow GirlStyleTips.com for all the latest beauty tips and tutorials!
FAQs
How long do sparkly nails last at home?
With proper application and a top coat, your sparkly nails can last up to two weeks without chipping.
What type of glitter should I use for elegant nails?
For an elegant look, choose fine glitter or holographic glitter to avoid an overly bold appearance. Use it sparingly for the perfect balance.
Can I add rhinestones to any nail design?
Yes, rhinestones can be added to any design, but they work best on accent nails or as a finishing touch on your ring fingers.
Is it necessary to use a base coat for sparkly nails?
Yes, a base coat is essential to protect your nails from staining and to ensure the glitter adheres properly to your nails.
How can I prevent my glitter nails from chipping?
Make sure to apply a top coat after the glitter, and allow your nails to dry fully. Also, avoid exposing your nails to excessive water right after your manicure.